Ingredients
Choux Pastry Shells
- 1 cup water
(can replace ¼ cup with milk for richer shells) - ½ cup (115 g) unsalted butter
- Pinch of salt
- 1 tablespoon sugar (optional — helps browning)
- 1 cup (130 g) all-purpose flour
- 4 large eggs (room temp)
Whipped Cream Filling
- 2 cups heavy whipping cream, cold
- 4 tablespoons powdered sugar (more to taste)
- 1 teaspoon vanilla extract
Optional: - 1–2 tablespoons milk powder (helps stabilize)
- Gelatin for firmness (recipe below)
🔥 Step 1 — Make Choux Pastry
In a medium saucepan, combine:
- Water
- Butter
- Salt
- Sugar (if using)
Bring mixture to a boil.
Remove from heat briefly and dump in flour all at once.
Stir vigorously with wooden spoon until dough forms a ball and pulls away from pan sides.
Return pan to low heat for 1–2 minutes to remove excess moisture — this helps shells stay crisp.
Transfer dough to bowl and let cool 5–8 minutes.
🥚 Step 2 — Add Eggs Slowly
Beat in eggs one at a time.
Each egg must be fully absorbed before adding the next.
Dough should become smooth, elastic, shiny, and scoopable —
thick but pipeable.
Lift spoon — dough should fall slowly like lava.
If too stiff, add 1 tablespoon milk.
🧁 Step 3 — Pipe & Bake the Shells
Line baking sheet with parchment (NOT wax paper).
Fill piping bag with round or star tip.
Pipe small mounds (space them — they puff).
Dip a fingertip into water and press down pointy peaks so they bake evenly.
Bake:
- 200°C / 400°F for 10–12 min (high heat puffs them)
- Reduce to 180°C / 350°F
- Bake 15–18 min more until golden brown, dry and hollow
⚠️ Do NOT open oven in first 15 minutes —
steam escapes = flat puffs!
Let cool completely on wire rack.
🍦 Step 4 — Make the Whipped Cream Filling
In a COLD bowl, beat:
- Heavy cream
- Vanilla
- Powdered sugar
Beat to stiff peaks — cream should stand tall, but stop before it turns grainy buttery.
OPTIONAL: To stabilize cream
- Whip ½ cup of cream separately with 1 tsp gelatin dissolved in 1 tbsp hot water
Then fold into remaining whipped cream
Prevents deflating in fridge.
🔪 Step 5 — Fill the Puffs
Cut each puff halfway or poke a small hole in the bottom.
Fill using piping bag (easiest!) with star or round nozzle.
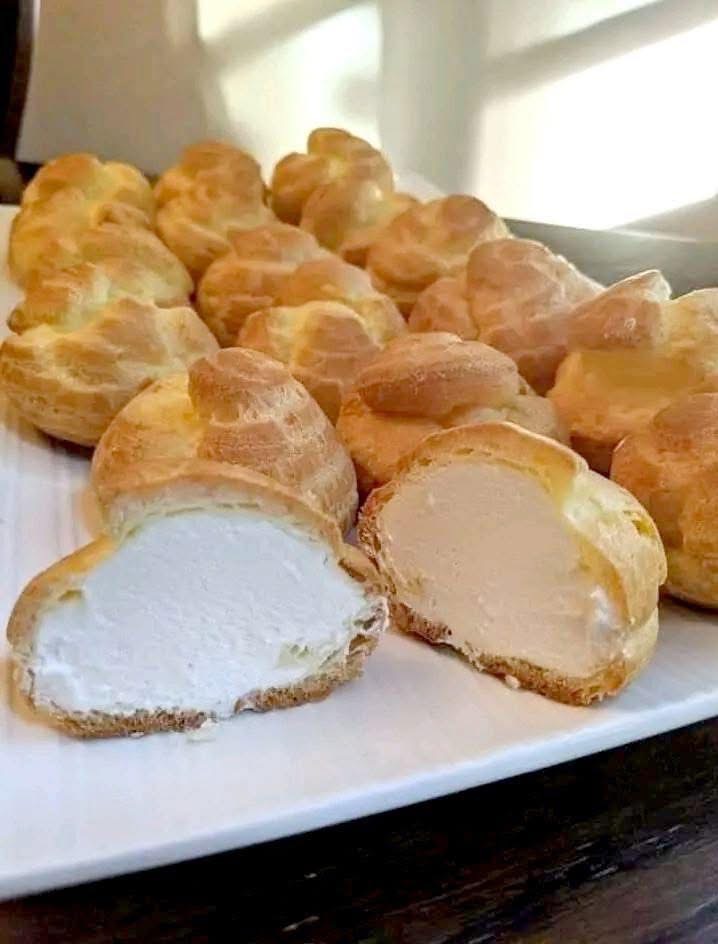
Fill generously — so cream billows out like the picture 😍
Keep puffs chilled if not serving immediately.
🍽️ Step 6 — Serve & Enjoy
Whipped cream puffs are delicious:
- Fresh & chilled
- Light and airy
- Not overly sweet
Dust with powdered sugar or drizzle melted chocolate if fancy.
Serve within a few hours for peak fluffiness.
💡 Expert Tips
Why shells deflate
- Dough too wet
- Oven opened early
- Underbaked inside
Solution: Dry dough longer & bake fully
Best cream for whipping
- Heavy cream 35% fat or more
- Chill bowl & beaters first
Make flavored fillings
Swap vanilla for:
- Lemon zest + juice 🍋
- Cocoa + powdered sugar 🍫
- Instant coffee + sugar ☕️
- Strawberry puree 🍓
Freezing (YES!)
- Freeze empty shells for months
- Re-crisp in oven 5–7 min
- Fill after thawing
Turn into… ECLAIRS!
Same dough, just pipe long shapes → fill + glaze
❄️ Storage
- Filled puffs: fridge 2 days (whipped cream may soften)
- Empty shells: 3–4 days room temp in airtight container
or Freeze up to 2 months
Avoid freezing filled puffs — cream ice crystals ruin fluff.
🎉 Perfect For:
- Afternoon dessert boards
- Iftar sweets
- Lunchbox treats
- Bake sale platters
- Last-minute hosting
- Kids (they will DEVOUR these)
They’re elegant yet incredibly simple — a guaranteed crowd favorite.
❤️ Final Thoughts
Whipped cream puffs prove that light doesn’t mean boring.
Their crisp shells give way to a dreamy filling that feels like eating a soft cloud.