Ingredients You Need
To make a full pan (about 20–25 squares), gather the following:
For the Base Layer
- 3 cups crispy rice cereal (like Rice Krispies)
- 1 cup creamy peanut butter
- 1 cup granulated sugar
- 1 cup light corn syrup or honey (but corn syrup holds shape better)
- 1 teaspoon vanilla extract
- A pinch of salt
For the Chocolate Topping
- 1 ½ cups milk chocolate chips
- ½ cup peanut butter (optional but recommended for velvet texture)
Optional additions:
- Crushed peanuts for added texture
- A sprinkle of sea salt flakes for a gourmet finish
- Swap peanut butter for almond or cashew butter for a different flavor
Preparing the Pan
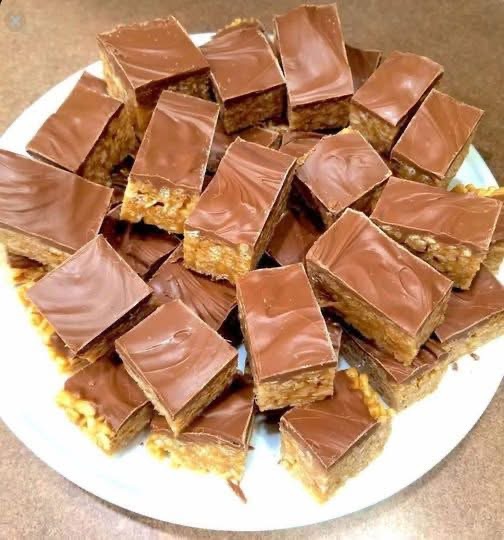
Before starting, choose your mold. A standard 9×13-inch pan makes thinner squares; an 8×8-inch pan makes thicker, tall bites similar to the photo. Line with parchment paper or grease lightly so the bars release easily. This step might feel optional, but it saves time and avoids the frustration of sticky cleanup.
Create the Peanut Butter Base
In a medium saucepan, combine the sugar and corn syrup over medium heat. Stir continuously until the mixture begins to bubble gently around the edges. You don’t want it to boil rapidly—just warm enough to dissolve the sugar fully. The moment you see tiny bubbles, remove the pan from heat.
Add the peanut butter, vanilla, and salt to the hot mixture. Stir until everything melts into a smooth, creamy blend without streaks. The aroma of warm peanut butter at this stage is irresistible.
Next, pour the hot peanut butter mixture over the crispy cereal in a large mixing bowl. Work quickly using a wooden spoon or silicone spatula. Fold the cereal into the mixture until everything is coated evenly—no dry cereal spots should remain.
Dump the coated cereal mix into your prepared pan. Press it down firmly using the back of a spoon or a piece of parchment paper. Compacting well ensures clean edges and firm bars that don’t crumble later.
Make the Chocolate Layer
In a microwave-safe bowl, melt the chocolate chips and peanut butter together. Heat in short 20–30 second bursts, stirring between each step until fully smooth. Alternatively, use a double boiler on the stove if you prefer.
Peanut butter mixed into the chocolate gives a creamy finish that stays soft and shiny even once cooled. If you like a firm snap on top, reduce peanut butter or skip it entirely.
Pour the melted chocolate mixture over the pressed cereal layer. Tilt the pan or use a spatula to spread the chocolate evenly. This glossy topping is what makes the bars look polished and professional.
Chilling and Cutting
Let the bars rest at room temperature long enough for the chocolate to begin setting. If you’re in a hurry, refrigerate the pan for 20–30 minutes. Do not freeze—frozen chocolate tends to crack too sharply when cut.
Once set, lift the bars from the pan using the parchment paper edges. Place on a cutting board and slice into squares or rectangles. Warming the knife slightly under hot water helps glide through the chocolate.
Serving Ideas
These bars are delicious as-is, but here are fun presentation twists:
- Serve chilled for a firmer bite
- Cut into tiny cubes for party trays
- Stack and tie with string for cute food gifts
- Drizzle white chocolate over the top for a bakery look
The combination of textures makes these a dessert people return to again and again.
Storage and Make-Ahead Tips
One of the benefits of this dessert is how long it keeps. Store the bars in an airtight container at room temperature for up to one week. If you live somewhere warm, refrigerated storage keeps the chocolate from melting. Separate layers with parchment if stacking. These bars also freeze well for up to two months—just thaw before eating.
Recipe Variations
You can transform this simple base into multiple dessert versions by swapping ingredients:
- Replace cereal with cornflakes for extra crunch
- Use dark chocolate instead of milk for a less sweet finish
- Stir in mini marshmallows for gooey pockets
- Add pretzels for sweet-salty contrast
- Use Nutella instead of peanut butter
Once you make the original, the possibilities become endless.
Conclusion
Chocolate Peanut Butter Crispy Bars prove that incredible desserts don’t require expensive ingredients, baking skills, or hours in the kitchen. With only a few pantry staples—cereal, sugar, peanut butter, and chocolate—you create something that feels rich, handmade, and comforting. Each bite delivers creamy, crunchy, and melt-in-your-mouth satisfaction.