What Are Preserved Lemons?
Preserved lemons are lemons that have been cured in salt and their own juices over several weeks. During this time, the rind softens, bitterness mellows, and the lemon develops a savory, almost floral aroma. Unlike fresh lemons, preserved lemons are mainly used for their peel, not the pulp.
This method has been used for centuries as a way to extend the shelf life of lemons while intensifying their flavor. In Moroccan cuisine, preserved lemons are considered essential, much like olive oil or garlic.
Why You Should Make Preserved Lemons at Home
Making preserved lemons at home is surprisingly easy and far superior to store-bought versions. Here’s why:
- You control the ingredients (no preservatives)
- The flavor is fresher and more aromatic
- It’s economical and reduces food waste
- They last for months, even up to a year
- They elevate simple dishes instantly
Once you have a jar in your fridge, you’ll find yourself reaching for it again and again.
Ingredients for Preserved Lemons
To make classic preserved lemons, you only need a few simple ingredients:
- 6–8 organic lemons (thin-skinned are best)
- ½ to ¾ cup coarse sea salt or kosher salt
- Fresh lemon juice (as needed)
- Optional spices:
- Bay leaves
- Black peppercorns
- Coriander seeds
- Cinnamon stick
- Cloves
Important note: Always use organic lemons, since you’ll be eating the peel.
Choosing the Right Lemons
Not all lemons are equal when it comes to preserving. Look for:
- Thin skin (thick rinds take longer to soften)
- Bright yellow color
- Firm texture
- Juicy lemons
Meyer lemons are excellent if available, as they are slightly sweeter and less acidic.
Preparing the Lemons
Before you begin, wash the lemons thoroughly under warm running water. Since the peel is the star of the recipe, you want them very clean.
You can scrub them gently with a vegetable brush and dry them completely.
How to Cut Lemons for Preserving
There are two popular methods:
Method 1: Quartered Lemons (Traditional)
- Cut off the stem end of each lemon.
- Slice the lemon lengthwise into quarters.
- Do not cut all the way through—keep the base intact so the lemon opens like a flower.
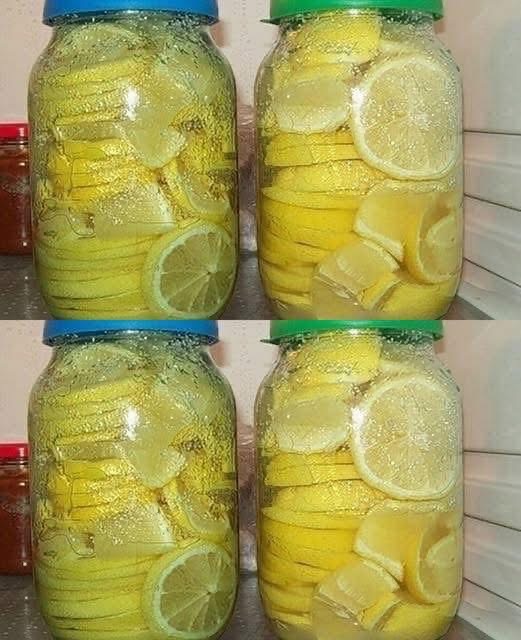
Method 2: Sliced Lemons (Like the Image)
- Slice lemons into thin or medium rounds.
- Remove visible seeds.
- This method is faster and packs neatly into jars.
Both methods work well. Sliced lemons soften faster, while quartered lemons look more traditional.
Salting the Lemons
Salt is the key to preservation.
- Sprinkle salt generously over each lemon piece
- Make sure salt reaches all surfaces
- Do not be shy—this is not the time to measure lightly
The salt draws out the juice, creating a natural brine that preserves the lemons safely.
Packing the Jars
- Sterilize glass jars by washing them in hot water and drying completely.
- Place a layer of salted lemons at the bottom.
- Press them down firmly with a spoon.
- Add optional spices between layers.
- Continue layering and pressing until the jar is full.
The lemons should release juice as you press them. If they are not fully submerged, add fresh lemon juice until covered.
Sealing and Fermentation Process
Once packed:
- Seal the jar tightly
- Leave it at room temperature for 2–3 days
- Shake the jar gently once a day to redistribute salt and juice
After the initial days, move the jar to a cool, dark place or the refrigerator.
How Long Do Preserved Lemons Take?
Preserved lemons are technically usable after 3–4 weeks, but they improve significantly with time.
- 3 weeks: Mildly preserved
- 1–2 months: Fully cured
- 3+ months: Deep, complex flavor
The peel should be soft and translucent when ready.
How to Know If Preserved Lemons Are Safe
Properly made preserved lemons are very safe. Still, check for:
- No mold on the surface
- Clean, lemony, salty smell
- Lemons fully submerged in liquid
If you see white sediment at the bottom, don’t worry—this is normal.
How to Use Preserved Lemons in Cooking
Preserved lemons are incredibly versatile. Common uses include:
- Moroccan chicken tagine with olives
- Lentil soups and stews
- Salad dressings
- Pasta sauces
- Roasted vegetables
- Seafood dishes
- Rice and grain bowls
How to Prepare Before Using
- Remove a piece from the jar
- Rinse under water to remove excess salt
- Scrape away the pulp (optional)
- Finely chop the peel and use as directed
Flavor Pairings That Work Beautifully
Preserved lemons pair well with:
- Garlic
- Olive oil
- Ginger
- Cumin
- Paprika
- Turmeric
- Cilantro
- Parsley
- Olives
These combinations are common in North African and Mediterranean kitchens.
Storage and Shelf Life
- Keep preserved lemons refrigerated after opening
- Always use a clean utensil
- Ensure lemons stay submerged in brine
When stored properly, preserved lemons can last up to 12 months or longer.
Common Mistakes to Avoid
- Using too little salt
- Not submerging lemons fully
- Using non-organic lemons
- Opening the jar too frequently early on
- Storing in warm conditions long-term
Avoiding these ensures perfect results every time.
Variations You Can Try
Once you master the classic version, experiment:
- Add chili flakes for heat
- Add rosemary or thyme for herbal notes
- Use lime or orange slices
- Combine lemon and ginger
Each variation brings a unique twist.
Health Benefits of Preserved Lemons
Preserved lemons offer more than flavor:
- Rich in vitamin C
- Support digestion
- Contain natural probiotics
- Boost immune system
- Enhance gut health
Because they are fermented, they can be gentler on digestion than fresh lemons.
Final Thoughts
Making preserved lemons at home is a rewarding and almost meditative process. With just lemons, salt, time, and patience, you create an ingredient that can transform everyday meals into something truly special.