Why You’ll Love No-Bake Cherry Cheesecake
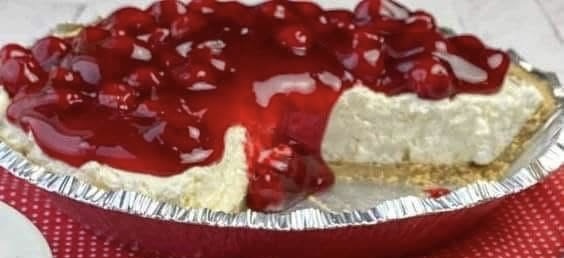
No-bake cherry cheesecake is loved for its simplicity and reliability. There’s no water bath, no cracking, and no long baking time. The flavors are balanced: slightly tangy cream cheese, sweet cherries, and a crunchy graham cracker crust that ties everything together.
It’s also very versatile. You can easily swap the topping, change the crust, or make individual servings in cups or jars. Whether served at a family dinner or a festive celebration, this dessert always disappears fast.
Ingredients for No-Bake Cherry Cheesecake
For the Graham Cracker Crust:
- 2 cups graham cracker crumbs
- 1/2 cup unsalted butter, melted
- 1/4 cup granulated sugar
For the Cheesecake Filling:
- 16 oz (2 blocks) cream cheese, softened
- 1 cup powdered sugar
- 1 teaspoon vanilla extract
- 1 tablespoon lemon juice (optional, for brightness)
- 1 1/2 cups heavy whipping cream, cold
For the Topping:
- 1 can (21 oz) cherry pie filling
Kitchen Tools You’ll Need
- 9-inch springform pan or pie dish
- Mixing bowls
- Electric mixer or hand whisk
- Spatula
- Measuring cups and spoons
Step-by-Step Instructions
Step 1: Make the Crust
In a medium bowl, mix together the graham cracker crumbs, melted butter, and sugar until the mixture resembles wet sand.
Press the mixture firmly into the bottom of your pan, using the back of a spoon or a flat glass to create an even layer. Place the crust in the refrigerator to chill while you prepare the filling.
Step 2: Prepare the Cream Cheese Mixture
In a large bowl, beat the softened cream cheese until smooth and creamy, with no lumps. Add the powdered sugar, vanilla extract, and lemon juice (if using). Beat until fully combined and silky.
Step 3: Whip the Cream
In a separate bowl, whip the cold heavy cream until stiff peaks form. This step is key to creating a light, fluffy cheesecake texture.
Step 4: Combine Filling
Gently fold the whipped cream into the cream cheese mixture using a spatula. Fold slowly to keep the mixture airy and smooth.
Step 5: Assemble the Cheesecake
Remove the crust from the refrigerator and spread the cheesecake filling evenly over it. Smooth the top with a spatula.
Cover and refrigerate for at least 4–6 hours, or overnight, until fully set.
Step 6: Add Cherry Topping
Just before serving, spoon the cherry pie filling evenly over the chilled cheesecake.
Serving Suggestions
No-bake cherry cheesecake is best served cold. For clean slices, use a sharp knife wiped clean between cuts.
- Serve as-is for a classic look
- Add extra whipped cream around the edges
- Garnish with fresh cherries or chocolate shavings
It pairs beautifully with coffee, tea, or a light dessert wine.
Tips for the Best No-Bake Cheesecake
- Use full-fat cream cheese for the best texture and flavor.
- Make sure the cream cheese is fully softened to avoid lumps.
- Chill long enough so the cheesecake sets properly.
- Fold, don’t mix, when adding whipped cream to keep it fluffy.
Variations You Can Try
Strawberry No-Bake Cheesecake
Swap cherry filling for strawberry pie filling or fresh strawberries.
Chocolate Cherry Cheesecake
Add 1/2 cup melted dark chocolate to the filling for a rich twist.
Oreo Crust Version
Replace graham crackers with crushed Oreos (no extra sugar needed).
Mini No-Bake Cheesecakes
Divide crust and filling into small jars or muffin cups for individual servings.
Storage and Make-Ahead Tips
Refrigerator:
Store covered in the refrigerator for up to 4 days.
Freezer:
Freeze the cheesecake without the topping for up to 2 months. Thaw overnight in the refrigerator and add cherry topping before serving.
Common Questions
Will this cheesecake hold its shape?
Yes, as long as it’s chilled properly and made with full-fat ingredients.
Can I use homemade cherry topping?
Absolutely. Homemade cherry compote works beautifully.
Can I make it ahead of time?
Yes. This dessert is perfect for making a day in advance.
Final Thoughts
No-Bake Cherry Cheesecake is the ultimate easy dessert: creamy, cool, and irresistibly delicious. With minimal effort and no baking required, it’s perfect for both beginners and experienced home cooks.