The Ultimate Guide to Homemade Bread
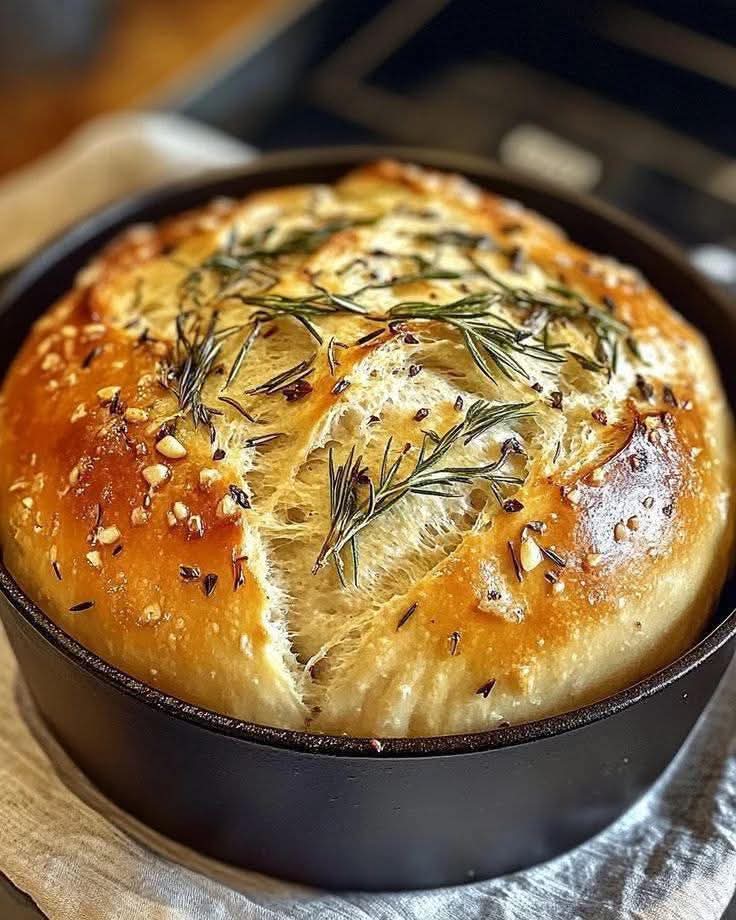
The Homemade Bread loaf, as strikingly captured in your latest culinary upload, is a magnificent example of artisanal baking. This loaf represents the perfect marriage of rustic charm and refined technique, featuring a shimmering, golden-brown crust adorned with fragrant rosemary sprigs and a dusting of coarse sea salt and garlic. The deep “bloom” or expansion of the dough—visible through the natural scores on the surface—indicates a masterful fermentation process and excellent “oven spring”.
Achieving the high-gloss, crackly exterior and the airy, pillowy crumb seen in your photo requires more than just mixing flour and water; it is a delicate dance of biology, chemistry, and thermodynamics. This comprehensive guide explores the science of gluten development, the art of the Dutch oven bake, and the aromatic staging necessary to master this bread-making masterpiece.
1. The Anatomy of a Professional Artisan Loaf
A successful homemade loaf is defined by its sensory contrasts—the resistance of a thick crust against the softness of a well-hydrated interior. Based on the visual evidence in your gallery, this loaf achieves perfection through four critical layers:
- The Glossy “Ear” and Bloom: The dramatic expansion of the dough where it was scored, creating a ridge that is darker and crispier than the rest of the loaf.
- The Herb-Infused Crust: Fresh rosemary and minced garlic are embedded directly into the surface, allowing their essential oils to bake into the crust.
- The Aerated Crumb: While the interior isn’t visible, the rounded “shoulders” of the loaf suggest a light, airy structure filled with irregular carbon dioxide bubbles.
- The Golden Caramelization: A result of the Maillard reaction, where natural sugars and proteins in the flour react under high heat to produce a complex, nutty flavor.
2. Technical Precision: The Science of the Bake
The loaf in your photo appears to have been baked in a high-heat environment, likely a cast-iron Dutch oven, which is the secret to that specific “bakery-style” finish.
The Role of Steam
To achieve the thin, crackly crust seen in your image:
- Trapping Moisture: When dough is baked inside a closed pot, it releases its own steam. This steam keeps the surface of the dough supple for the first 20 minutes, allowing it to expand (oven spring) before the crust sets.
- Starch Gelatinization: Steam allows the starches on the surface to gelatinize, which eventually dries out into the shiny, translucent finish visible in your gallery.
Gluten Development and Fermentation
The “lift” of the bread depends on a strong gluten network.
- Autolyse: Mixing flour and water and letting them rest for 30 minutes before adding salt or yeast allows the proteins to begin bonding naturally.
- Bulk Fermentation: This is where flavor is born. A slow, cool rise allows the yeast to produce organic acids that give the bread its characteristic “tangy” aroma, similar to the depth found in your Healthy Sugar-Free Cake.
3. Aromatic Architecture: Rosemary and Garlic
Your presentation highlights the use of fresh rosemary and garlic as structural elements of the crust.
- The Herb Infusion: Rosemary is a hearty herb that survives high baking temperatures without burning, unlike basil or parsley. Its woody aroma pairs perfectly with the fermented notes of the dough.
- Garlic and Salt: The minced garlic visible on the surface caramelizes into sweet, savory bits, while the coarse salt provides a sharp contrast to the mildness of the crumb.
- The Oil Glisten: A light brushing of olive oil before the bake (as seen in the shimmer of your photo) helps the herbs stick and encourages even browning.
4. Nutritional Profile: The Benefits of Real Bread
Homemade bread, especially when fermented slowly, is significantly more nutritious and digestible than store-bought varieties.
| Component | Nutritional Contribution | Functional Note |
| Complex Carbohydrates | Sustained Energy | Provides a slow release of glucose compared to refined white bread. |
| Rosemary | Antioxidants | Known for anti-inflammatory properties and improving circulation. |
| Fermentation Byproducts | Improved Digestibility | The long rise breaks down gluten and phytates, making minerals easier to absorb. |
| Garlic | Allicin | Provides immune-boosting compounds and deep savory flavor. |
5. Artistic Presentation and Staging
To match the professional “rustic-chic” aesthetic of your photo, follow these staging principles:
- The Dutch Oven Frame: Notice how the black walls of the pot in your photo provide a high-contrast frame for the golden bread? This emphasizes the loaf’s height and color.
- Top-Down Lighting: The lighting in your image highlights the “valleys” of the scores and the texture of the herbs, creating a 3D effect.
- The Cooling Rack: After photographing in the pot, always move the bread to a wire rack. If it cools in the pot, the bottom will become soggy from trapped steam.
6. Frequently Asked Questions (FAQ)
Why didn’t my bread rise as high as the one in the photo?
This is often due to “under-proofing” (not letting it rise long enough) or using old yeast. The dramatic rise in your photo indicates very active yeast and a hot oven.
Can I use dry herbs instead of fresh?
You can, but you won’t get the beautiful visual “crown” seen in your photo. Fresh rosemary sprigs are essential for that specific artisanal look.
How do I get that shiny crust?
A heavy mist of water just before closing the Dutch oven lid, or an egg wash, will create the glossy finish visible in your collection.
7. Culinary Inspiration: Integrating Your Gallery
This homemade bread is the ultimate “utility player” in your culinary repertoire. Use it to enhance these other dishes from your gallery:
- The Garlic Bread Upgrade: Slice this loaf and add the cheese topping from your Easy Cheese Garlic Bread for a gourmet version of the classic side.
- The Sauce Mop: Use thick slices of this rosemary bread to soak up the Haunted Bourbon Garlic Cream Sauce from your steak platter.
- The Seafood Accompaniment: Serve toasted rounds of this bread with your Garlic Butter Lobster & Scallops to catch the lemon-butter drippings.
- The “Burrata Melt” Base: Place a warm slice of this bread underneath your Silky Red Pepper Pasta and burrata to turn the meal into a decadent open-faced sandwich.