Ingredients You Will Need
To make these cheesy garlic breadsticks, you don’t need any complicated or hard-to-find ingredients. Everything is simple and affordable, yet the result tastes like something straight from a restaurant.
For the Dough
2 ½ cups all-purpose flour
1 tablespoon sugar
1 teaspoon salt
2 ¼ teaspoons instant yeast (1 packet)
¾ cup warm water (about 110°F / 43°C)
2 tablespoons olive oil
For the Cheese Filling and Topping
2 cups shredded mozzarella cheese
½ cup shredded cheddar cheese (optional, for extra flavor)
¼ cup grated Parmesan cheese
For the Garlic Butter
4 tablespoons unsalted butter, melted
3 cloves garlic, finely minced
1 teaspoon dried oregano
1 teaspoon dried parsley or Italian seasoning
½ teaspoon garlic powder
Salt to taste
Optional for Serving
Marinara sauce
Ranch dressing
Garlic aioli
Why You’ll Love This Recipe
These cheesy garlic breadsticks are more than just bread and cheese. They’re a crowd-pleaser that works for almost any occasion. The recipe is flexible, meaning you can adjust the cheese, herbs, or even the shape to suit your preferences.
They are:
Perfectly crispy on the edges
Soft and fluffy in the center
Loaded with cheesy, garlicky flavor
Easy to prepare with simple ingredients
Ideal for dipping or serving alongside meals
Once you try them, you’ll find yourself making them again and again.
Preparing the Dough
The foundation of great breadsticks is a good dough. Don’t worry if you’ve never made dough before—this process is very beginner-friendly.
Start by combining the warm water, sugar, and yeast in a large mixing bowl. Stir gently and let it sit for about 5 minutes. The mixture should become slightly foamy, which means the yeast is active and ready to work.
Add the olive oil, salt, and about half of the flour to the bowl. Mix with a spoon or spatula until combined. Gradually add the remaining flour, mixing until a soft dough forms.
Transfer the dough to a lightly floured surface and knead for 6 to 8 minutes. The dough should become smooth, elastic, and slightly tacky but not sticky. If it feels too sticky, add a small amount of flour; if it’s too dry, add a teaspoon of water.
Place the dough in a lightly oiled bowl, cover it with a clean kitchen towel, and let it rise in a warm place for about 60 minutes, or until it doubles in size.
Making the Garlic Butter
While the dough is rising, prepare the garlic butter that will give these breadsticks their signature flavor.
In a small bowl, combine the melted butter, minced garlic, oregano, parsley, garlic powder, and a pinch of salt. Mix well and set aside. This butter will be used both before and after baking, ensuring maximum garlic flavor in every bite.
Shaping the Breadsticks
Once the dough has doubled in size, gently punch it down to release excess air. Transfer it to a floured surface and roll it into a rectangle, approximately 12 x 9 inches.
Using a sharp knife or pizza cutter, cut the dough into long strips. You should get about 8 to 10 breadsticks, depending on how thick you want them.
Place a generous line of shredded mozzarella cheese along the center of each strip. If you’re using cheddar cheese, sprinkle some of it alongside the mozzarella. Carefully fold the dough over the cheese and pinch the edges to seal, forming long stuffed breadsticks.
Arrange the breadsticks seam-side down on a parchment-lined baking sheet, leaving a little space between each one.
Adding the Cheese and Butter Topping
Brush the tops of the breadsticks with the prepared garlic butter, making sure to cover them evenly. Sprinkle grated Parmesan cheese over the top for extra flavor and a golden crust.
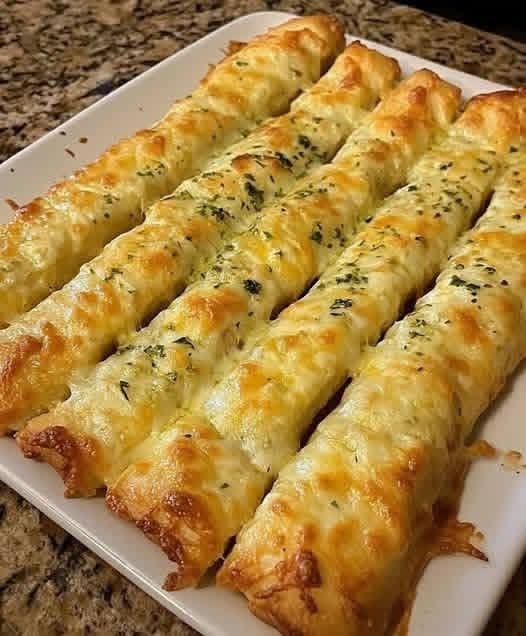
At this stage, you can also add a little more mozzarella on top if you want them extra cheesy, just like the ones you see in the image.
Baking the Breadsticks
Preheat your oven to 400°F (200°C).
Bake the breadsticks for 15 to 18 minutes, or until they are puffed, golden brown, and bubbling with melted cheese. The edges should be crisp, and the tops should have beautiful golden spots.
Once they’re out of the oven, brush them again with the remaining garlic butter. This final step adds shine, aroma, and an extra layer of flavor that makes these breadsticks truly irresistible.
Serving Suggestions
These cheesy garlic breadsticks are incredibly versatile. You can serve them as an appetizer, side dish, or even a light meal.
They pair perfectly with:
Classic marinara sauce
Creamy ranch dressing
Alfredo sauce
Tomato soup
Pasta dishes like spaghetti or lasagna
They’re also great on their own, fresh out of the oven, when the cheese is still stretchy and warm.
Tips for Perfect Cheesy Breadsticks
To get the best results every time, keep these tips in mind:
Use freshly shredded cheese for better melting and flavor.
Don’t overfill the breadsticks, or the cheese may leak out during baking.
Seal the dough edges well to keep the cheese inside.
Brush with garlic butter both before and after baking for maximum taste.
Serve warm for the best texture and cheese pull.
Variations You Can Try
One of the best things about this recipe is how easy it is to customize.
You can:
Add cooked bacon bits inside for a smoky flavor
Use a mix of cheeses like provolone or Monterey Jack
Add chili flakes for a spicy kick
Sprinkle fresh herbs like basil or rosemary on top
Make them smaller for party-friendly bites
Each variation brings a new twist to the classic cheesy garlic breadstick.
Storage and Reheating
If you have leftovers, store them in an airtight container in the refrigerator for up to 3 days. To reheat, place them in the oven at 350°F (180°C) for about 8 to 10 minutes. This helps maintain their crispiness better than a microwave.
Final Thoughts
These Cheesy Garlic Breadsticks are the kind of recipe that never fails to impress. They look beautiful, taste amazing, and fill your kitchen with the comforting aroma of garlic and melted cheese. Whether you’re serving guests or treating yourself, this recipe delivers bakery-quality results with minimal effort.