Crispy Chicken Alfredo is a beloved contemporary classic that marries the rich, velvety traditions of Roman-style Alfredo sauce with the indulgent, golden crunch of a perfectly breaded chicken cutlet. As showcased in your collection, this dish relies on a stunning contrast of textures—the shattering exterior of the chicken against the silkiness of fettuccine swirled in a parmesan-heavy cream sauce.
To truly master this “big” flavor profile, one must navigate the delicate balance of heat management, sauce emulsification, and breading technology. This 800-word guide provides the deep culinary theory and step-by-step precision required to recreate the restaurant-quality platter seen in your gallery.
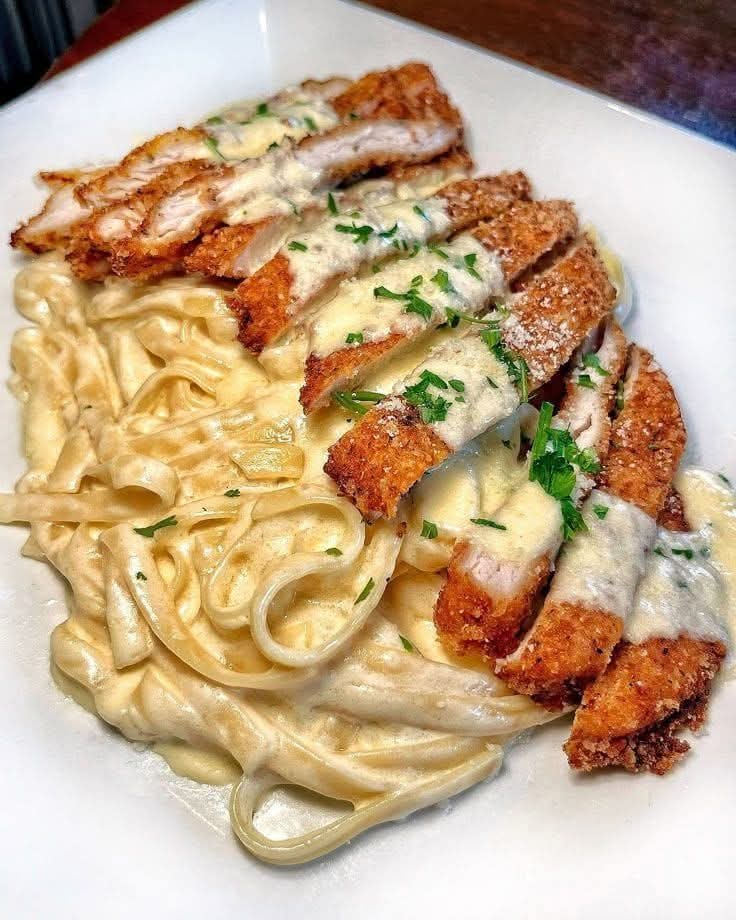
1. The Anatomy of the Perfect Plate
A successful Crispy Chicken Alfredo, like the one in your image, is defined by three distinct layers:
- The Protein Foundation: The chicken should be a thin-cut “schnitzel” style breast. Its large surface area ensures maximum crunch-to-meat ratio. The breading should be a deep golden brown, indicating a successful Maillard reaction.
- The Pasta Architecture: Fettuccine is the traditional choice because its wide, flat surface acts as a broad “conveyor belt” for the thick Alfredo sauce. The pasta should be cooked al dente to provide a firm structural counterpoint to the soft sauce.
- The Emulsified Sauce: A true Alfredo isn’t just cream; it is an emulsion of fat (butter/cream) and protein (Parmesan cheese). It should coat the pasta in a thick, glossy sheen rather than pooling at the bottom of the plate.
- The Garnish Pop: Freshly chopped flat-leaf parsley and a dusting of finely grated Parmesan provide the essential visual “spark” and a hit of fresh, herbaceous salinity.
2. The Science of the “Crispy” Chicken
Achieving the level of crunch seen in your photo requires a dedicated three-stage breading process (Standard Breading Procedure):
Stage 1: The Flour Dredge
Lightly coat the chicken in seasoned all-purpose flour. This step is crucial for drying the surface of the meat, providing a “glue” for the egg wash to adhere to. Without this, the breading will likely slide off in the pan.
Stage 2: The Egg Wash
Dip the floured chicken into whisked eggs. The proteins in the egg provide the structural bond between the flour and the final breadcrumb layer.
Stage 3: The Panko Finish
For the ultimate “big” crunch, use Panko breadcrumbs rather than traditional fine crumbs. Panko consists of larger, airy flakes that create more surface area and jagged peaks, which catch the oil and fry into a glass-like texture.
The Shallow Fry
Use a neutral oil with a high smoke point (like grapeseed or vegetable oil). The oil must be hot enough (175°C / 350°F) so that the chicken sizzles instantly. If the oil is too cold, the breading will absorb the fat and become soggy; if it’s too hot, the outside will burn before the chicken is cooked through.
3. Mastering the Alfredo Sauce Emulsion
The sauce in your image is thick, creamy, and opaque. To achieve this without the sauce “breaking” (separating into oil and clumps), follow the rules of emulsification:
- Heavy Cream Base: Start by reducing heavy cream by about one-third. This concentrates the fats and proteins, making for a more stable sauce.
- The Butter Melt: Whisk in cold, unsalted butter cubes one at a time. This “monter au beurre” technique creates a velvety texture.
- Quality Cheese: Use authentic Parmigiano-Reggiano. Pre-shredded cheeses often contain anti-caking agents like cellulose, which will prevent the cheese from melting smoothly and result in a grainy sauce.
- Residual Heat: Turn the heat to the lowest setting or off completely before adding the cheese. Excess heat will cause the cheese proteins to tighten and “seize,” ruining the silkiness.
4. Nutritional Profile: The Indulgent Power Plate
While this is undeniably a decadent meal, it offers significant nutritional value when viewed as a high-energy “comfort” plate:
| Component | Primary Nutrients | Functional Role |
| Chicken Breast | Lean Protein, B6, Niacin | Essential for muscle tissue repair and metabolic function. |
| Fettuccine | Complex Carbohydrates | Provides a rapid source of glucose for brain and muscle energy. |
| Parmesan Cheese | Calcium, Protein, Phosphorus | High-density source of bone-supporting minerals and savory “umami.” |
| Heavy Cream | Fat-Soluble Vitamins (A, D, E, K) | Provides the necessary fats for nutrient absorption and long-term satiety. |
5. Professional Tips for Success
The Pasta Water “Gold”
Before draining your fettuccine, reserve a cup of the starchy pasta water. If your Alfredo sauce becomes too thick or begins to look “tight,” a splash of this water will help re-emulsify the sauce and loosen it to the perfect consistency.
Diagonal Slicing
To replicate the presentation in your image, let the chicken rest for 2 minutes after frying. Then, use a very sharp chef’s knife to slice the breast on a 45-degree diagonal. This exposes the juicy interior and creates a fan-like aesthetic that sits beautifully atop the pasta.
The “Swell” of the Sauce
Always toss the pasta into the sauce pan rather than pouring sauce over the pasta. This ensures every individual strand is coated. Let it sit for 60 seconds before plating; the pasta will slightly absorb the sauce, intensifying the flavor.
6. Frequently Asked Questions (FAQ)
Can I use chicken thighs instead?
Yes, but thighs have more fat and connective tissue. They will be juicier, but they require a slightly longer frying time than the thin-cut breast shown in your photo.
How do I keep the chicken crispy if I’m making a large batch?
Do not stack the fried chicken on paper towels. Instead, place them on a wire cooling rack over a baking sheet in a low oven (90°C / 200°F). Air circulation is the enemy of sogginess.
Is there a lighter version?
You can substitute half the cream with whole milk and a teaspoon of cornstarch, or use an air-fryer for the chicken to reduce the oil content. However, the “big” flavor of the original recipe relies on the fats for that signature mouthfeel.