✨ Time Does the Work: An Introduction to No-Knead Baking
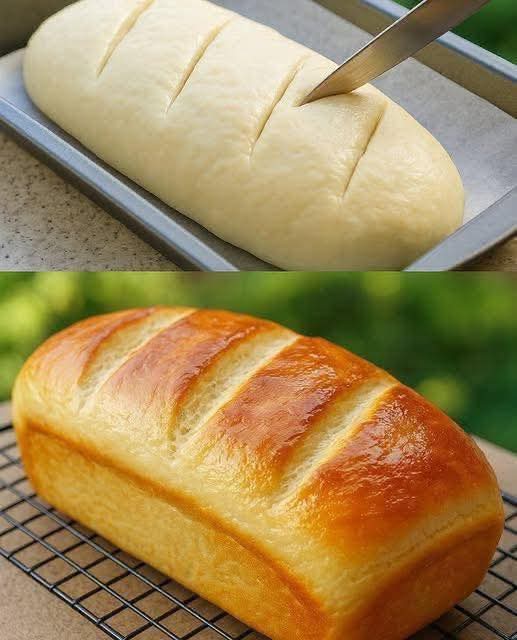
The No-Knead Artisan Bread is a revolutionary recipe that empowers even novice bakers to produce a truly professional-quality loaf with a thick, crackly crust and an airy, open crumb, just like the one featured in the photograph. This method proves that time is often a more effective baker than sheer effort. Instead of rigorous kneading, the dough is allowed to rest and ferment for 12 to 18 hours, a process that naturally develops the complex gluten structure required for the bread’s superior texture. The secret to achieving that deep, golden-brown, and intensely crisp crust—so perfectly illustrated in the final image—is baking the dough inside a preheated, covered Dutch Oven. This technique traps the dough’s own steam, creating a moist environment essential for maximizing the crust’s formation. This recipe is minimal in effort, yet maximal in reward, offering a truly exceptional homemade bread experience.
📝 Ingredients You’ll Need (The Core Four)
This recipe relies on the simplicity of just four core ingredients, allowing the rich, yeasty flavor of the fermentation process to truly shine.
For the Dough:
- 3 cups Bread Flour or All-Purpose Flour (approximately 400 grams).
- 1 1/2 teaspoons Kosher Salt (or non-iodized table salt).
- 1/4 teaspoon Instant Dry Yeast (no need to proof or activate).
- 1 5/8 cups Cold Water (approximately 400 ml).
For Preparation and Baking:
- 1 tablespoon Extra Flour (for dusting the work surface).
- A 5-7 quart Heavy-Bottomed Pot with a tight-fitting lid (Dutch Oven).
- Parchment Paper.
🔪 Step-by-Step Instructions (Mastering the 18-Hour Technique)
Success with the no-knead method requires patience, as the active work is short but the rest period is long.
Day One: Mixing and Long Fermentation
- Mix Dry Ingredients: In a large mixing bowl, whisk together the flour, salt, and instant dry yeast until thoroughly combined. This ensures the yeast and salt are distributed evenly.
- Add Water and Mix: Pour the cold water into the dry ingredients all at once. Use a wooden spoon or spatula to mix until a shaggy, cohesive dough mass forms. Avoid over-mixing; the goal is just to hydrate the flour. The resulting dough will be very wet and sticky, which is correct for this high-hydration method.
- The First Rise (Slow Fermentation): Cover the bowl tightly with plastic wrap or a secure lid. Allow the dough to ferment at room temperature (ideally between 65^\circ\text{F} and 72^\circ\text{F} / 18^\circ\text{C} and 22^\circ\text{C}) for 12 to 18 hours. Indicator: The dough will be ready when its surface is riddled with small air bubbles and the volume has roughly doubled.
Day Two: Shaping and Baking the Perfect Loaf
- Prepare the Dough (Light Folding): Generously dust a clean work surface with flour. Gently scrape the sticky dough out of the bowl onto the floured surface using a rubber spatula. Sprinkle the top of the dough lightly with flour.
- Folding: Carefully fold the edges of the dough over onto itself two to three times to form a loose, round shape. The goal here is not to completely knock the air out but to slightly strengthen the dough’s structure.
- The Second Rise (Rest): Transfer the dough to a bowl or a cloth-lined proofing basket dusted with flour, or place it directly onto a large square of flour-dusted parchment paper. Cover the dough and let it rest for 30 minutes to 1.5 hours. Indicator: The dough will be slightly puffy and ready for baking.
4. Baking in the Dutch Oven
- Preheat the Oven and Pot: About 30 minutes before the end of the second rise, place your covered Dutch Oven (pot and lid) into the cold oven. Preheat the oven and the empty Dutch Oven together to 450^\circ\text{F} (230^\circ\text{C}). Preheating the pot is critical for achieving the intense crust.
- Transfer the Dough: Carefully remove the piping hot Dutch Oven from the oven (use heavy oven mitts!). Lift the dough using the edges of the parchment paper and gently lower the dough, still on the paper, into the hot pot.
- Covered Bake: Cover the pot with its lid and return it to the oven. Bake the covered dough for 30 minutes. (This covered phase creates the essential steam needed for maximum oven spring).
- Uncovered Bake: After 30 minutes, remove the lid. Reduce the oven temperature to 425^\circ\text{F} (220^\circ\text{C}). Continue baking for another 15 to 25 minutes, or until the bread achieves a deep, rich golden-brown color.
- Cooling: Carefully remove the finished bread from the Dutch Oven and place it immediately on a wire rack to cool completely for at least one hour before slicing. Cooling allows the internal structure to fully set and preserves the integrity of the crisp crust.
⭐ Pro Tips and Recipe Variations (Ensuring Success)
- Flour Quality: If available, using Bread Flour instead of All-Purpose Flour will yield a slightly better structure and a chewier texture due to its higher protein content.
- The Cold Water Benefit: Using cold water instead of warm water deliberately slows the fermentation process, which is key to developing those deep, complex flavors inherent in artisan bread.
- Doneness Check: To confirm the bread is fully baked, tap the bottom of the loaf—it should sound hollow. For professional results, the internal temperature should read between 205^\circ\text{F} and 210^\circ\text{F} (96^\circ\text{C} and 99^\circ\text{C}) with a meat thermometer.
- Re-Crisping the Crust: If the crust softens over time, you can place the loaf directly on the oven rack (no pot) in a 350^\circ\text{F} (175^\circ\text{C}) oven for 5 to 10 minutes to revive the crunch.
- Adding Seeds or Grains: For a seeded loaf, gently fold 1/4 cup of whole seeds (such as sunflower, flax, or sesame) into the dough after the initial 18-hour rest, during the light folding stage.
- Why the Dutch Oven? The sealed pot simulates a steam-injected commercial oven. The steam keeps the crust soft initially, allowing the dough to expand maximally (oven spring). Once the lid is removed, the heat browns the loaf perfectly, resulting in the iconic thick, crisp crust.