Ingredients
For the crust:
- 2 ½ cups graham cracker crumbs
- ½ cup unsalted butter, melted
- ¼ cup granulated sugar
For the pineapple cream filling:
- 1 (8 oz) package cream cheese, softened
- ½ cup powdered sugar
- 1 teaspoon vanilla extract
- 1 cup crushed pineapple, well drained
- 1 cup whipped topping (Cool Whip or homemade whipped cream)
For the top whipped layer:
- 2 cups whipped topping
- ¼ cup powdered sugar (optional, for sweetness and stability)
For the golden crumble topping:
- ¾ cup graham cracker crumbs
- 2 tablespoons melted butter
- 1 tablespoon sugar
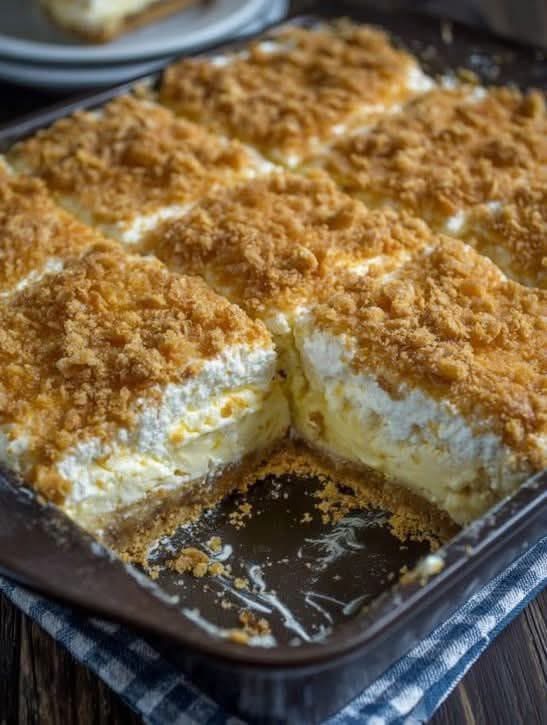
These ingredients create the layered structure you see in the picture—firm crust, creamy middle, fluffy top, and a crunchy crumble sprinkled beautifully on the surface.
How to Make the Buttery Graham Cracker Crust
Start by mixing the graham cracker crumbs, melted butter, and granulated sugar in a bowl. Stir until the crumbs are fully coated and hold together when you press them between your fingers.
Pour the mixture into a baking dish and use a flat spatula or the bottom of a cup to press it firmly into an even layer. This step is important because it forms the foundation of the dessert. The crust should be packed tightly so it doesn’t crumble when you cut the bars.
Place the dish in the refrigerator for at least 15 minutes to help the crust firm up while you make the creamy filling.
Preparing the Pineapple Cream Filling
In a mixing bowl, beat the softened cream cheese until smooth and fluffy. Add powdered sugar and vanilla, then continue beating until completely combined. The mixture should be creamy without lumps.
Fold in the drained crushed pineapple. It’s very important that the pineapple is well drained, otherwise the filling may become watery. Gently mix in one cup of whipped topping to lighten the texture and create that cloud-like creaminess you see in the image.
Spread this mixture evenly over the chilled graham cracker crust, smoothing the top with a spatula. This creamy pineapple layer is what gives the dessert its signature flavor.
Creating the Fluffy Whipped Layer
In a separate bowl, combine two cups of whipped topping with optional powdered sugar. The sugar helps the topping hold its shape longer and adds a bit of sweetness.
Spread this fluffy mixture over the pineapple filling. You should now have a beautiful, thick, two-layer dessert that already looks delicious—and we’re not even finished.
Making the Crumble Topping
For the golden crumb topping seen in the picture, stir graham cracker crumbs with melted butter and sugar until the mixture is evenly coated. Sprinkle it generously over the top of the whipped layer.
The crumb topping adds texture and a buttery crunch that contrasts perfectly with the soft layers beneath it.
Chilling the Dessert
Cover the dish and refrigerate for at least 4 hours, though overnight is best. This helps the layers firm up and allows the flavors to come together beautifully.
The dessert in your picture looks well-set with perfect slices—this only happens when the dessert is fully chilled.
Serving the Pineapple Dream Dessert
Once chilled, use a sharp knife to slice the dessert into squares. Each slice should have:
- A firm bottom crust
- A thick, creamy pineapple layer
- A fluffy white whipped layer
- A golden crumb topping
Just like the image you provided, the layers should be clean and distinct.
This dessert is perfect for serving at parties, family gatherings, or as a refreshing treat after a warm meal. It’s cool, sweet, and light enough that everyone always comes back for seconds.
Storage Tips
- Store covered in the refrigerator for up to 4 days.
- Do not freeze, as the texture of the whipped layers may change.
- Keep chilled until ready to serve.
Why This Recipe Always Works
This dessert is foolproof because it uses simple, well-balanced ingredients that work together without requiring baking. The crust firms up in the fridge, the filling stabilizes with cream cheese and whipped topping, and the crumble provides the perfect finishing touch.