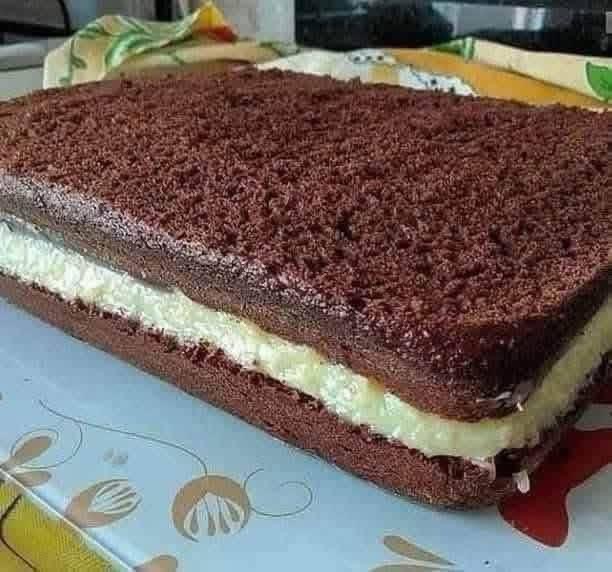
There are few desserts more comforting than a tender chocolate cake filled generously with creamy, sweet filling. The cake in your picture shows a perfect balance between rich cocoa sponge and a thick, luscious cream layer. This recipe aims to reproduce that exact texture: moist, airy, and soft enough to melt in your mouth, while the cream remains stable, light, and delicious.
This recipe consists of three main parts:
- The chocolate sponge cake
- The creamy vanilla filling
- The assembly and resting (very important for texture)
Let’s begin.
⭐
INGREDIENTS
🌑 For the Chocolate Cake
- 3 large eggs
- 1 cup granulated sugar
- 1/2 cup vegetable oil
- 1 cup milk (warm)
- 2 cups all-purpose flour
- 1/2 cup unsweetened cocoa powder
- 1 tablespoon baking powder
- 1 teaspoon vanilla extract
- A pinch of salt
🌕 For the Cream Filling
Choose one cream style depending on what you prefer. Both taste delicious and match the cake in the photo.
Option A — Milk Cream (Closest to the Photo)
- 2 cups milk
- 3 tablespoons cornstarch
- 1/2 cup sugar
- 1 tablespoon butter
- 1 teaspoon vanilla
- 4 tablespoons powdered milk (optional but highly recommended)
Option B — Whipped Cream + Custard
- 1 cup cold heavy cream
- 1/4 cup powdered sugar
- 1 teaspoon vanilla
- 1 cup store-bought or homemade pastry cream (mixed in after whipping)
🥣
STEP 1 — Prepare the Cake Batter
Start by preheating your oven to 170°C (340°F). Line a rectangular baking tray with parchment paper.
If you want your cake thick like in the picture, use a smaller tray (about 24×28 cm).
For a thinner cake, use a larger tray.
👉 Whip the Eggs and Sugar
In a mixing bowl, beat:
- 3 eggs
- 1 cup sugar
Beat for 3–4 minutes until light, fluffy, and pale yellow. This step helps the cake rise naturally and creates its sponge-like structure.
👉 Add Oil and Milk
Slowly pour in:
- 1/2 cup oil
- 1 cup warm milk
Mix gently until combined. Avoid over-beating.
👉 Sift in Dry Ingredients
Sift together:
- Flour
- Cocoa powder
- Baking powder
- Salt
Sifting removes lumps and ensures the cake stays light.
Fold gently into the wet mixture using a spatula.
Add vanilla at the end.
You should have a smooth, pourable batter.
🔥
STEP 2 — Bake the Cake
Pour the batter into your lined tray. Tap it lightly on the counter to remove bubbles.
Bake for 20–28 minutes, depending on thickness.
Check by inserting a toothpick:
- If it comes out clean → done
- If it comes out wet → bake 5 more minutes
Once done, remove from oven and let the cake cool completely.
Warm cake + cream = disaster, so patience is essential!
When cool, use a long knife to cut the cake evenly into two layers (top and bottom).
🥛
STEP 3 — Make the Cream Filling
Now prepare the cream that will become the center layer.
⭐ Option A — Milk Cream (Thick & Smooth)
This is the option that most closely matches the picture.
✔ Mix Ingredients
In a saucepan, whisk:
- Milk
- Sugar
- Cornstarch
- Powdered milk (if using)
Cook on medium heat, stirring constantly.
As it heats, the mixture will thicken into a smooth custard.
✔ Add Butter & Vanilla
Once thick and glossy:
- Remove from heat
- Stir in butter
- Add vanilla
Let it cool until lukewarm.
If too hot, it will melt the cake; if too cold, it becomes too thick to spread.
⭐ Option B — Cream & Custard Filling (Lighter)
This cream is fluffier and perfect for those who love a lighter texture.
✔ Beat the Cream
Whip heavy cream with powdered sugar and vanilla until stiff peaks form.
✔ Fold Into Custard
Gently mix whipped cream with pastry cream or pudding until fully combined.
Keep refrigerated until needed.
🍰
STEP 4 — Assemble the Cake
With your cake layers ready and cream prepared, assembly begins.
✔ Place Bottom Layer
Lay the bottom chocolate sponge layer on a flat surface or tray.
✔ Spread the Cream
Using a spatula, spread your cream filling evenly across the entire cake.
Make sure:
- It reaches the edges
- The layer is uniform
- It is thick (your image shows a rich amount of cream)
✔ Add Top Layer
Place the second cake layer gently on top.
Press very lightly to secure the cream.
If cream spills out a bit, use a knife to smooth the edges.
❄️
STEP 5 — Chill for Best Texture
Refrigerate the assembled cake for 2–4 hours.
This allows:
- Cream to firm up
- Cake to absorb moisture
- Cleaner, neater slices
- Perfect sandwich texture
Overnight chilling makes it even better.
🍽️
SERVING THE CAKE
Once chilled, slice into rectangles or squares.
This cake is perfect for:
- Afternoon tea
- Snacks
- School lunches
- Celebrations
- Ramadan iftar desserts
- Coffee pairing
Its flavor is rich but not overwhelming, and the cream gives a refreshing balance to the chocolate sponge.
💡
TIPS FOR A PERFECT RESULT
✔ Use warm milk in the batter
It makes the sponge softer.
✔ Do not over-bake
Over-baked sponge becomes dry and crumbly.
✔ Chill before slicing
Cold cream gives smooth, clean layers.
✔ Add powdered milk to the filling
This boosts flavor and creaminess.
✔ For extra flavor
Brush cake layers lightly with:
- Coffee
- Chocolate milk
- Vanilla syrup
🎉
OPTIONAL VARIATIONS
Chocolate Cream Filling
Add 2 tablespoons cocoa to the cream mixture.
Coconut Filling
Mix 1/2 cup shredded coconut into the filling.
Kinder Style
Cover the whole cake in chocolate glaze.
Orange Version
Add orange zest to the cream.